
Want to know how to build an iOS app? As a mobile developer, having a firm grasp on Apple's App Store is essential if you want to tap into one of the most profitable channels for reaching ready-to-buy customers.
It's true, in 2024 alone, the App Store generated over $103 billion in revenue, accounting for more than twice the revenue of Google Play.
iOS may still have fewer users than Android, but those users consistently spend more and engage more deeply with apps. For developers and businesses, mastering the App Store is one of the most profitable channels for reaching ready-to-buy customers.
Today's iOS development landscape has also evolved with SwiftUI as the default UI framework, AI-assisted coding tools (like GitHub Copilot and Xcode's AI features) accelerating development, and cloud backends like Firebase, AWS Amplify, and Supabase making it easier than ever to scale.
In this guide, we'll go beyond the basics to show you how to maximize success with your app's launch on Apple's platform.
From planning your app idea to publishing to the App Store and finally growing and monetizing it, we'll walk through the whole journey of how to build an iOS app.
Whether you're a startup founder, a developer looking to publish your first app, or a business leader exploring mobile growth, this guide will give you both the technical steps and the strategic insights needed to succeed.
Are you ready to start your development project?
We have the developers you need to take your development project in the right direction. Companies have proven to grow their business faster with Trio.
Step 1: Planning Your iOS App
How you are going to build your iOS app is dependent on what it is you are making.
Whether you are designing an app that is complementary to your business, a standalone app that is your business, or a mobile game, planning is one of the most critical steps to take before building your iOS app.
A plan should always start with a complete outline of your idea on paper.
Try to map out exactly what your app will entail, noting which features are the most important to prioritize.
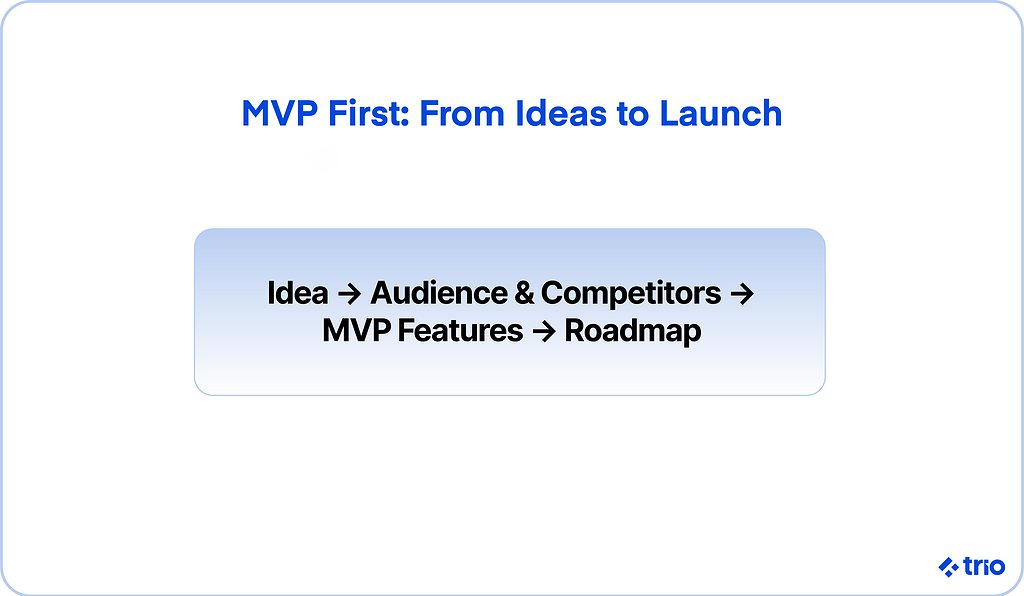
It's helpful to think in terms of a Minimum Viable Product (MVP) for your first app, carefully deciding what aspects of your app are the most important and should be prioritized for your launch.
There are plenty of tools for planning your app on paper, such as Mind Maps and the Lean Canvas model.
After forming an overarching plan, it's vital to ask yourself some different questions to prepare yourself to build and launch your app.
Let's go ahead and cover a few of these in detail.
Identify Your Target Audience
Having a clear understanding of customers is key for any business to succeed. The process to build an iOS app is no different.
Conducting market research on your potential users can help guide your decisions when planning your app.
You can conduct market research in a variety of ways, including but not limited to:
- Use surveys to better understand your customers by utilizing tools like TypeForm or SurveyMonkey.
- If you have the resources, consider running a few focus groups to understand your customers' needs better.
- You can utilize some of the countless tools to research various customer demographics. For example, Apple provides built-in analytics for developers, and tools like HubSpot, Statista, SimilarWeb, and Data.ai (formerly App Annie) give strong insights into market segments.

By taking the time to understand your customers better, you can have a much higher chance of creating an app that people actually want.
There's no worse mistake in mobile development than investing time and money in a project only to discover that there is no real market demand for it.
Understanding this is fundamental to building an app that retains active users and is profitable.
Recent success stories like Duolingo (language learning gamification) and Calm (mental health subscriptions) show that apps succeed when they are tightly aligned with audience needs.
Analyze Your Competitors?
Understanding your competition is equally important as understanding your users.
There is seemingly an app for everything, so whatever you are building, there is likely some form of competition.
Take the time to go through the App Store yourself, and seek what currently exists that does the same thing you want to do.
Go as far as to install and test your competition's apps; it can help you understand where they are exceeding and falling behind.
Build your iOS app to compete with your competitor's features and user experience directly. This is the best way to have a chance at staying competitive.
It's also important to understand your competition's overarching business model.
Doing this can help you plan how you are going to monetize your app; it can be helpful to emulate what is working for those at the top of Apple's charts.
It's easier said than done, but the goal of building your app around your competition is to replicate what's working for them and improve upon it.
While planning your app, it can be helpful to list your competition's most beloved features and strategize ways to do them better.
If you research your competition and find that your app is truly original, it's worth getting started on your idea sooner rather than later.
Tools like SensorTower and AppMagic let you monitor downloads, revenue, and feature rollouts, helping you anticipate where the market is headed.
Choose a Business Model
Now that you have some idea of what you want your app to look like, it's time to consider what business model makes sense for you.
There are several ways you can make money with an app on the App Store. What works for your app all depends on what you are building.
Here are a few examples:
Freemium
This is an increasingly popular model for mobile apps, and it's very effective at converting users into paying customers.
Using the freemium model, developers allow users to download their app for free and usually provide some form of full functionality without paying.
Monetization and the "premium" of freemium come in the form of in-app purchases.
Digital content and services can be sold within apps, making it remarkably easy for users to spend money.
Freemium is a standard business model in mobile games, and it is quickly becoming the most prevalent across most apps.
For example, many apps will keep their most desired content behind some form of payment.
This allows them to use their app as a demo of sorts.
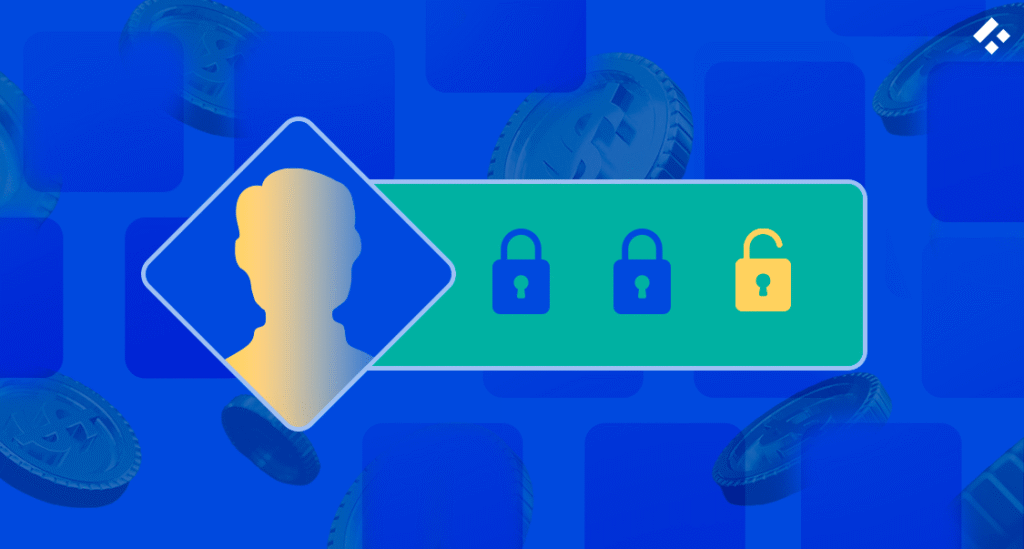
It is required in your App Store listing to be transparent about your in-app purchases, so use this space to give users an idea as to what kind of monetization to expect from your app.
Here's an example of this on an app's listing:

Apple makes it very easy to implement in-app purchases and does everything required to facilitate payments to you.
This comes at a price, though; they take a fairly hefty 30% commission on all in-app purchases made on digital content.
This may sound like a lot, but the business model is so lucrative that it often justifies the fee.
Subscription
Oftentimes, your app might involve some recurring transaction, perhaps on a monthly or yearly basis.
This can be very profitable if your app becomes a big part of its users' lives.
It's safe to say that if your users love using your app, they will become long-time paying customers in no time.
The App Store platform makes it easy for users to subscribe to your app, enabling auto-renewal of their services upon subscription.
You can even easily implement differential pricing depending on the payment terms of a user's subscription.
A subscription business model is still privy to Apple's commission structure, but it has policies in place that reward iOS developers for retaining long-term customers.
First-year subscriptions give Apple a 30% cut, but after a user has subscribed for over a year, this commission fee goes down to 15%.
It's nice to see Apple rewarding developers for good retention; it's an example of one of their platforms' policies that can be considered developer-friendly.
Paid
Although it appears that all apps are transitioning to a free business model, some still operate on a paid basis.
This is quite simple; it involves a user paying an upfront fee to install an app, similar to purchasing any product.
Buying a paid app grants users continual access to the app and support through updates.
Some developers have started selling apps on a paid model and implementing in-app purchases within these paid apps.
This can be viewed as a form of 'double-dipping', but it's certainly profitable to utilize this mix of freemium and a paid model to maximize revenue from your app.
As already mentioned, Apple lowers its revenue cut from 30% to 15% after one year for long-term subscriptions. This makes retention a direct driver of profitability.
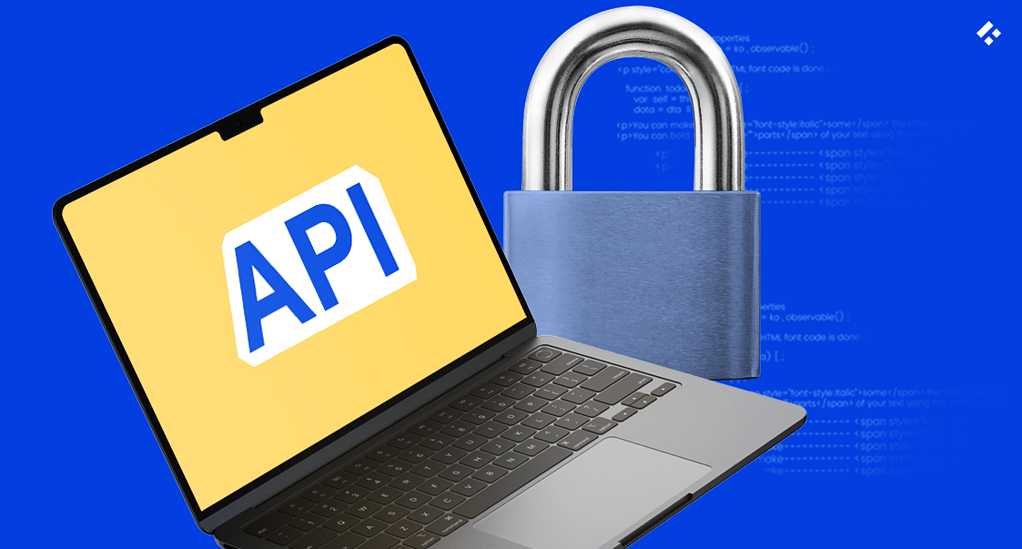
Step 2: Set Up Your Development Environment
Before you can start coding, you need the right tools in place. Setting up your iOS development environment ensures you can build, test, and eventually publish your app without unnecessary roadblocks.
Now that you have a basic understanding of your app, you can start making these kinds of decisions.
Join the Apple Developer Program
You need to enroll in the Apple Developer Program to publish apps on the App Store.
Although it can be pretty expensive, at $99/year for individuals and organizations, you get access to beta OS versions and tools like TestFlight for beta testing.
You can also access advanced capabilities, such as push notifications and Apple Pay, that are now expected in even basic Apple apps.
Install Xcode
Xcode is Apple's official IDE (Integrated Development Environment). It's where you'll design, build, and test your iOS app.
Luckily, it's free to download from the Mac App Store, so you don't have to pay extra for the developer program, while getting access to tools like the iOS Simulator, Swift compiler, interface builder, and debugging tools.
Swift and SwiftUI
Swift is Apple's programming language for iOS apps. SwiftUI is the modern UI framework introduced in 2019 that makes building user interfaces faster and more declarative.
The basics include things like variables, functions, structs, and classes, much like any other programming language.
Set Up a Simulator or Device
You can run your app in the iOS Simulator (built into Xcode) or on a physical iPhone/iPad.
The simulator is definitely best for testing, since you can see how variables like different screen sizes affect your app. However, physical devices are also helpful in verifying features that require hardware, such as a camera.
Step 3: Build Your iOS App
With your development environment ready, it's time to start building your app. At this stage, you'll design the user interface, connect your features, and integrate the data and services your app needs.
Design Your User Interface with SwiftUI
SwiftUI makes it simple to create responsive, modern interfaces with less code. You describe what the UI should look like, and SwiftUI handles the rendering and interactions.
Let's look at an example of what it might look like to create a login form:
import SwiftUI
struct LoginView: View {
@State private var username = ""
@State private var password = ""
var body: some View {
    VStack {
        TextField("Username", text: $username)
            .padding()
            .textFieldStyle(RoundedBorderTextFieldStyle())

        SecureField("Password", text: $password)
            .padding()
            .textFieldStyle(RoundedBorderTextFieldStyle())

        Button("Log In") {
            print("Logging in…")
        }
        .padding()
    }
    .padding()
}
}
Work With Data
Most apps need to fetch, store, or sync data.
There are two types of storage, local and remote. For local storage, you can use UserDefaults or CoreData for saving settings or small data sets. Remote data requires an entirely different skillset. Your developers will need to work with Fetch APIs with URLSession or use third-party services.
You'll also need to consider how you can ensure scalability going forward. In our experience, the best approach is to start with a cloud-based application. Cloud backends like AWS enable you to handle massive spikes in authentication requirements, database sizes, and hosting without incurring unnecessary costs.
Decide on Your Core Features
It can get expensive to build the best possible app from the start. Instead, we recommend that you decide on which features you need to make up your Minimum Viable Product (MVP).
You'll need your most prominent feature, the thing that makes you stand out to users, but you will probably also need things like authentication, notifications, payments, and a couple of others.
It's better to launch with a smaller set of polished, reliable features and prove that you can make money, or adjust based on user feedback.
Select Your Frameworks and Libraries
Outside of your basic programming language, consider the frameworks and libraries you can use. When it comes to iOS development, you don't need to reinvent the wheel. There are several options already available.
- CoreData (local database).
- Combine (reactive programming for handling async events).
- HealthKit / ARKit / CoreML (specialized APIs for health, augmented reality, and machine learning).
- Swift Package Manager (SPM) for importing third-party libraries.
Step 4: Test Your iOS App
Before you launch, you need to make sure your app works smoothly, performs well, and delivers a great user experience. Testing is critical for catching bugs early and avoiding costly App Store rejections.
We've already mentioned several simulators, which will be useful. Xcode is great for a quick preview; don't forget to test device-specific features.
Xcode includes XCTest, Apple's testing framework for writing automated tests. You can use it to write unit tests to confirm that your app logic works as expected.
UI tests are also critical. XCTest supports UI testing, where the test interacts with your app as a user would. Think everything from tapping buttons and typing into fields to helping you catch layout issues.
Beta Testing
Sometimes, you will want to release your app, or later, some new features, to beta testers to make sure that you cover any obvious issues with minimal impact.
Apple's TestFlight platform makes it easy to share beta builds with up to 10,000 testers! You can also submit your app for final App Store approval directly in TestFlight.
CI/CD (Continuous Integration and Development)
If you plan frequent updates, CI/CD tools help automate testing and deployment. GitHub Actions, Bitrise, and Circle CI are all pretty popular, and our developers have used all of them throughout their experience.
Regardless of which option you choose, the benefits are incredibly valuable, including automatic testing and preparing your releases.
Step 5: Publish on the App Store
Once you've completed building your iOS app, it's time to launch it on the App Store.
Please don't get too excited and rush through the listing process, though; you want to make sure to do it right.
It's crucial to maintain top-notch quality at this stage, as it can significantly increase the likelihood that users will discover your app.
This is coupled with the fact that Apple has a fairly strict review process for which apps they allow on the App Store; you can see a list here of common reasons they reject app listings.
The overall quality and professionalism of your listing will likely reflect your success, so be sure to focus on some of these aspects in your store listing:
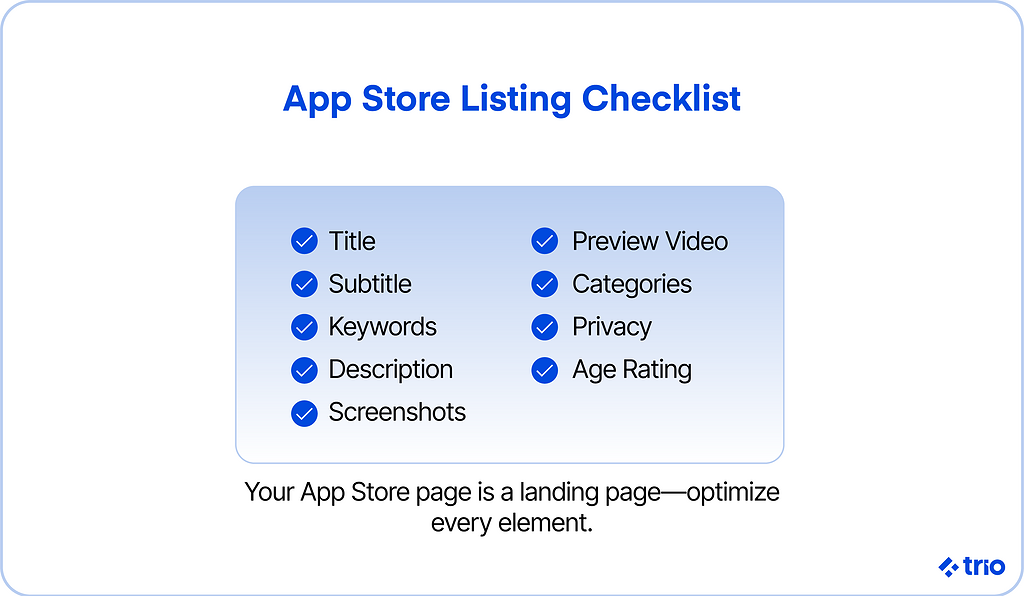
Technical Submission Checklist
Before you can even upload your app, you'll need to complete a few technical requirements in Xcode and App Store Connect:
- Bundle Identifier: A unique ID for your app (set in Xcode).
- Provisioning Profile & Certificates: Used to sign your app so Apple can verify its authenticity.
- Archive & Upload: Use Xcode's "Archive" function to create a release build, then upload to App Store Connect.
- App Store Connect Setup: Create a new app listing with your app's name, description, keywords, and category.
- TestFlight Distribution: (optional) Submit a beta build first to gather early feedback before full release.
Description
The quality of your written description should be of the highest possible quality.
If you don't have an in-house writer or feel confident in your writing abilities, consider hiring a professional writer.
This is the space where you must be creative and strategic with how you describe your app.
Consider using bullet lists to detail your features and keep textual content concise.
Doing this will take into account consumers' increasingly low attention span and respect their time.
It's essential to fully describe your app here, making sure to include as many important details as possible.
Outline the exact features that your users can expect from your app, and describe why they should use it. This is your chance to sell your potential customers on what to expect from your app, so make a concentrated effort to be transparent about what they get from your app.
This section is ideal for highlighting the differences between various app versions, such as a paid or freemium model.
You will gain your users' respect if your store listing is clear, allowing them to understand your app before they download it.
Pictures and Preview
People are visual creatures, so it's essential to put an appropriate amount of energy into this part of your app's listing.
Visual content will shape the first impression of most of your potential users, so make sure to keep it high-quality.
Remember, many users won't even scroll past the screenshots before deciding whether to install your app. Consider this when choosing visual content to represent your app: you want
For your more visual users, screenshots and videos can make a huge difference in getting installs.
If you show examples of what using your app looks like, users can get a good idea if it is what they are looking for before they install.
It is vital to capture screenshots of your app's most important product features and display what they look like in use.
It is also suitable to put captions and graphics over your images, making sure that they are clear and describe precisely what your app is like in action.
Including a video showcasing your key features can also be effective, as it can significantly help capture the interest of your potential customers.
Categories
Many users browse the App Store's various categories when searching for the perfect app.
Ensuring your app is listed in the appropriate category is key to capturing these users in their search process and turning them into installs.
You are required to assign a primary category to your app, with the option for a second category as well.
For more niche, harder-to-categorize apps, secondary categories can be pretty useful:
- Does your app deal with transactions or monetary payments? The Finance category is the place for you.
- Are you designing a food delivery app? Food and Beverage is a relevant category that has you covered.
They may be pretty broad, but the App Store's categories give you a chance to be specific about what your app is about.
Apple provides increased visibility in your respective categories based on popularity, making it crucial to dominate your category if you want to drive growth for your app.
Take a look at the kind of premium visibility a highly popular app like Shopify gets:

Make sure to list your app in a category that describes it well; it factors into Apple's approval process and can help you capture new users.
Many App Store users utilize the various categories to discover new apps. By placing your app in the right location, you can attract users who are more likely to become long-time customers.
Apple has an extensive list of various categories; they cover them in more detail here. It's worth taking a close look and deciding on your app's ideal category before launching.
Step 6: Grow and Monetize Your App
Success on the App Store usually comes down to two intertwined goals: growth and monetization. How you balance them may ultimately decide if your app becomes a fixture on someone's home screen or quietly disappears.
You probably thought about revenue models back in the planning stage, but now it's time to test those ideas in the wild.
That said, even the most carefully chosen revenue model won't do you any good if people can't find the app. This is where App Store Optimization (ASO) comes in.
It's less mysterious than it sounds. Clear titles, smart use of keywords, and screenshots that actually make someone stop scrolling. Your first three screenshots matter most; they're the hook.
Outside the App Store, marketing is what really widens your reach. Organic discovery happens, but it's rarely enough to fuel real growth.
Paid channels like Apple Search Ads and targeted social campaigns help put your app in front of the right people.
Then you need to keep people coming back. Retention, not acquisition, is what separates an app that takes off from one that fizzles.
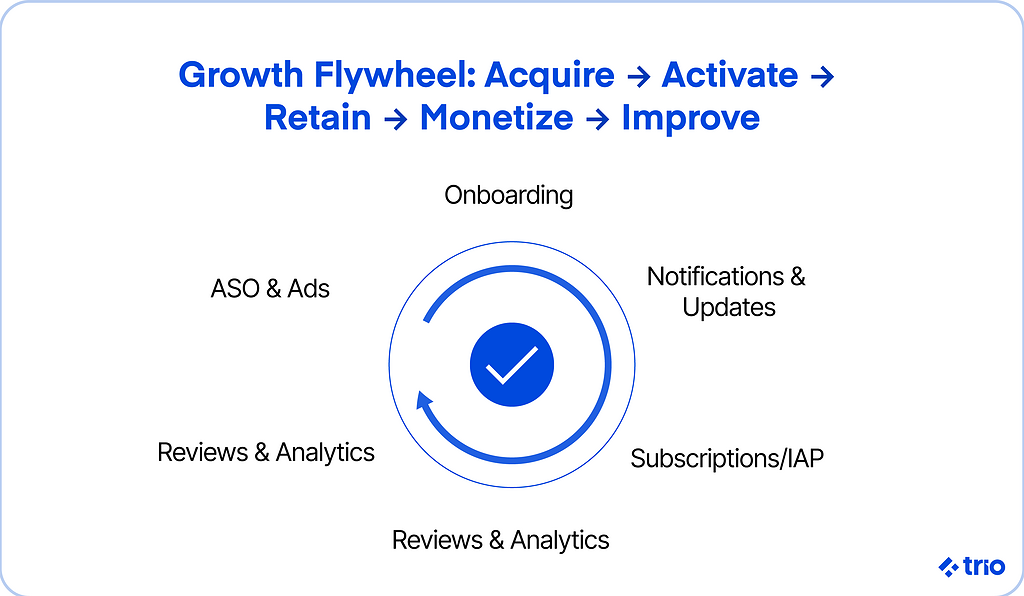
Reviews and Feedback
Consumers these days live and die by product reviews, and it's no different for apps.
Getting positive reviews is essential to succeed in the App Store. There are several ways to ensure your app achieves and maintains a high overall rating.
Kindly asking users for reviews within your app can be an excellent way to get more reviews.
Doing it in a way that's tasteful and not intrusive to their in-app experience is advised if you wish to get positive reviews from this.
Apple makes it easy for developers to respond to reviews through its App Store developer tools. This is a great way to give your company some presence in the review sections and reply to questions and concerns in reviews.
Maintaining positive and professional composure is crucial here, as your responses are essentially the face of the company.
Overall, there's no hidden secret to getting high reviews in the App Store; it all comes down to creating an app that users enjoy using.
Ensuring a top-notch user experience and maintaining your app are two ways to do this confidently.
It is possible to erase your app's reviews after each update, but be aware that this removes all reviews in the process, both positive and negative.
Updates
One of the best ways to ensure your users have the best possible experience with your app is to keep it updated frequently.
Nobody likes an unstable app plagued by issues like crashes or slowdowns, so staying on top of updates is crucial to prevent a poor user experience.
Keeping tabs on your user feedback is vital to know what needs to be added and fixed within your app.
Providing an in-app feedback mechanism allows you to stay on top of this without relying solely on App Store reviews.
Make your users' feedback or suggestions feel valued by considering in-app rewards to show your gratitude.
Frequent internal testing will be another great way to know what to prioritize in updates. Make sure to take advantage of testing software such as TestComplete or Appium to make testing a bit easier.
Use them to visualize and understand key performance metrics in your app; this can help guide your update roadmap.
Depending on your app's business model, frequent updates can often increase your active users and retention.
This is especially true for mobile games, where seasonal content and constant updates can keep users coming back for extended periods of time.

Conclusion
Now that you know some of the key things to consider to build an iOS app for Apple's App Store, you can start to make your dream app a reality.
It's a competitive market, but there is still plenty of room for apps to succeed in this mobile marketplace.
If you'd like to learn more about planning, launching, and tracking your iOS app, Trio can help you.
We offer the proper support to help you build or maintain your iOS app. Learn more about the process of hiring qualified iOS developers.
Reach out to get in touch!
FAQ
How long does it take to build an iOS app?
The time it takes to build an iOS app depends on your requirements. Smaller apps, with limited features, can be coded a lot faster than complex apps that require a variety of integrations, for example.
How much does it cost to build an iOS app?
The cost to build an iOS app varies depending on the scope of your project and the skills required. A simple app that doesn't need a unique skillset will cost a lot less than an app with a variety of complex features that require developers with exceptional skills and experience.
What programming language should I use for iOS apps?
The best programming language to use for iOS apps is Swift. It is Apple's recommendation. You can still use Objective-C, and it's often seen in legacy projects.
Do you need a Mac to build an iOS app?
You need a Mac to run Xcode and publish to the App Store; however, you can prototype using browser-based tools and cloud build platforms until you are ready to commit.
Can you create an iOS app without coding?
You can create simple iPhone apps using no-code builders like FlutterFlow or Bubble; however, learning Swift provides you with far more control, performance, and long-term flexibility.
Is it free to build an iOS app?
You can build and test iOS apps for free on a Mac, and publishing requires a $99/year Apple Developer Program membership.